Google Tag Manager
Workspace
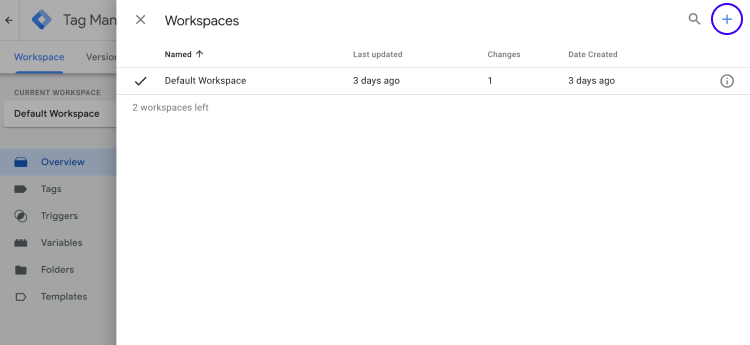
It is recommended to avoid working directly on the master branch (or the default Workspace in this case). To begin, launch GTM (Google Tag Manager). In the left sidebar, locate the Default Workspace option and click on it. Then, in the upper right corner, look for the + icon and click on it.
| Field: | Input: |
|---|---|
| Name | Experimentation setup |
| Description | Setting up everything to start with experimentation |
Save.
This will help ensure that no one else is working on the same version of the code as we are. It is a security measure to prevent conflicts and data loss.
Variable (Version)
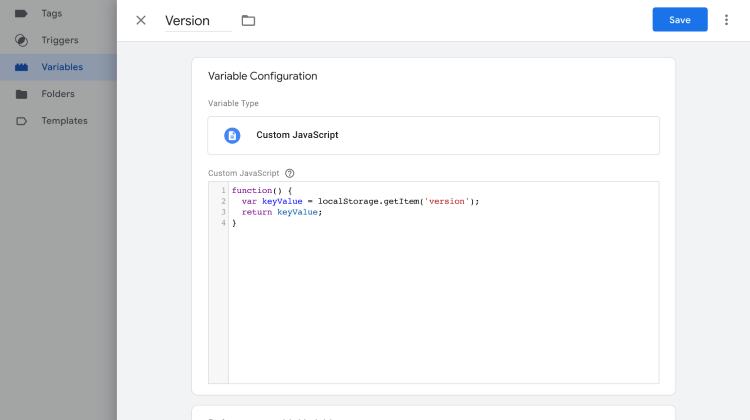
The first step is to create a new variable. This JavaScript will create the version row in the visitor's browser localStorage.
It is important to note that browsers do not automatically reset
localStorage, unlike cookies. Visitors can manually reset it by clearing their browser's cache and other stored data, but this is unlikely. As a result, running experiments in this manner can last longer than cookies that are automatically reset, which can improve the accuracy of your data.
Steps:
- In the sidebar, navigate to Variables.
- Click Add new User-Defined Variable.
- Name the variable Version.
- In the Variable Configuration section, select Variable Type as Custom JavaScript.
- Copy and paste the following code into the variable:
- Save
Triggers
Next, the triggers. Three triggers are required to execute a single experiment:
- Initialization trigger: This trigger fires when the experiment is first initialized.
- Control – Page View: This trigger fires when a visitor views the control page.
- Variant – Page View: This trigger fires when a visitor views the variant page.
Initialization
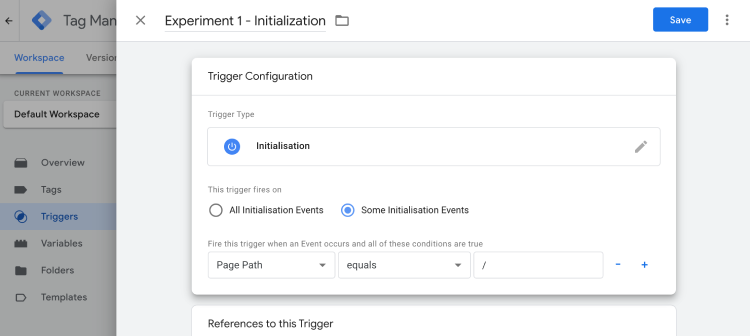
This trigger fires when the experiment is first initialized. To create it, follow these steps:
- In Google Tag Manager, navigate to Triggers.
- Click the New button to create a new trigger.
- Name the trigger Experiment 1 – Initialization.
- Select Initialization as Page View.
-
Select This trigger fires on as Some Initialization Events.
Field: Input: First Page path Second equals Third / -
Click Save.
If the Path option is not in the list, select Choose Built-In Variable and then select Page path.
The third field with the
/represents the homepage.This is also where you can add more requirements, such as device targeting.
Control - Page View
Next, we will create the trigger for the control experiment. To do this, follow these steps:
- In Google Tag Manager, navigate to Triggers.
- Click the New button to create a new trigger.
- Name the trigger Experiment 1 – Control – Page View.
- In the Trigger Configuration section, select Trigger Type as Page View and Trigger Event as Page View.
- In the Trigger Details section, select This trigger fires on as Some Page Views.
-
Add the following details to the first row.
Field: Input: First Version Second matches RegEx Third Slot 0$|Slot 1$|Slot 2$|Slot 3$|Slot 4 -
Add an additional row with the following details.
Field: Input: First Page path Second equals Third / -
Click Save.

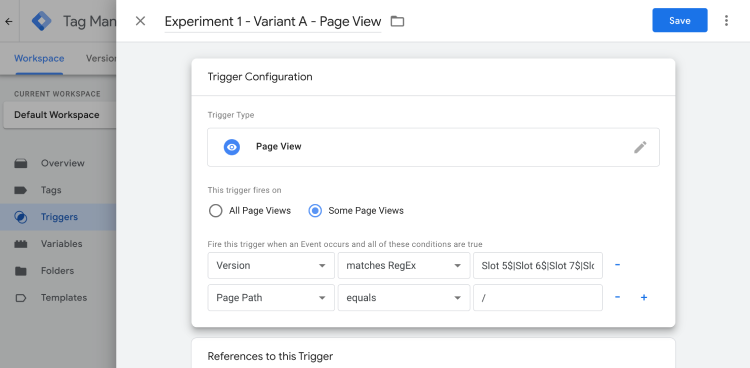
Variant - Page View
Now, let’s delve into the experiment trigger (for the variant).
- In Google Tag Manager, navigate to Triggers.
- Click the New button to create a new trigger.
- Name the trigger Experiment 1 – Variant – Page View.
- In the Trigger Configuration section, select Trigger Type as Page View and Trigger Event as Page View.
- In the Trigger Details section, select This trigger fires on as Some Page Views.
-
Add the following details to the first row.
Field: Input: First Version Second matches RegEx Third Slot 5$|Slot 6$|Slot 7$|Slot 8$|Slot 9$ -
Add an additional row with the following details.
Field: Input: First Page path Second equals Third / -
Click Save.
Tags
It is now time to add three new tags and make adjustments to the configuration. This will ensure that the data is sent to the custom definition we created in GA.
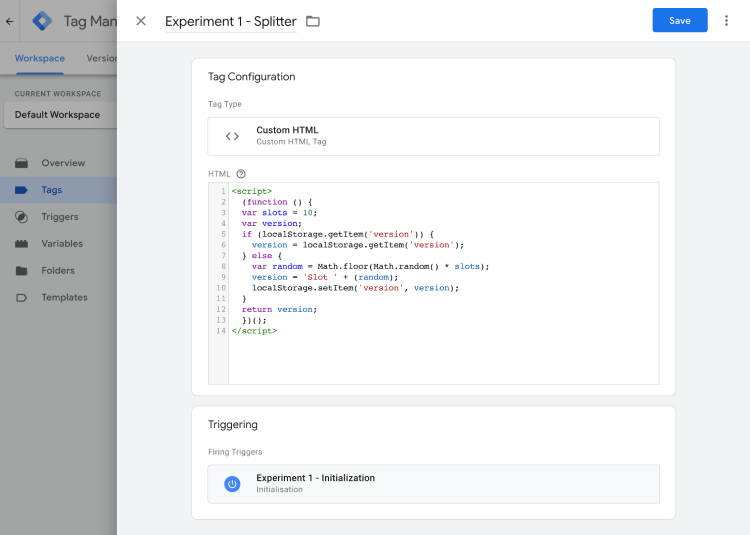
Splitter Tag
Once the Initialization trigger has been activated, we will use a tag to randomly assign visitors to either the control or variant. This split tag will be triggered accordingly.
To create the split tag, follow these steps:
- In Google Tag Manager, navigate to Tags.
- Click the New button to create a new tag.
- Name the tag Experiment 1 – Splitter.
- In the Tag Configuration section, select Tag Type as Custom HTML.
-
Copy and paste the following code into the Custom HTML block:
-
Select the Trigger as Experiment 1 – Initialization.
- Click Save.
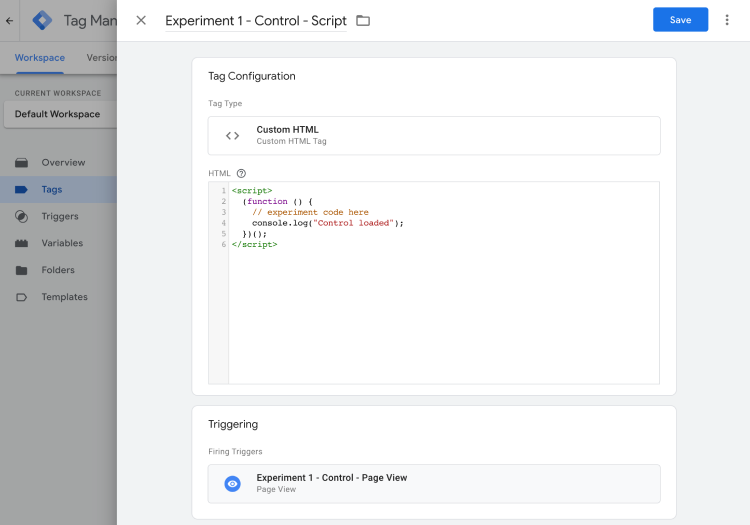
Control Tag
Once the splitter tag has successfully executed and the user falls within one of the slots from 0 to 4, the control tag will be triggered.
To create the control tag, follow these steps:
- In Google Tag Manager, navigate to Tags.
- Click the New button to create a new tag.
- Name the tag Experiment 1 – Control – Script.
- In the Tag Configuration section, select Tag Type as Custom HTML.
-
Copy and paste the following code into the Custom HTML block:
-
Select the Trigger as Experiment 1 – Control – Page View.
- Click Save.
A script is also being run for the control variant. This allows for additional tracking to be set up, for example.
Variant Tag
Once the splitter tag has successfully executed and the user falls within one of the slots from 5 to 9, the variant tag will be triggered.
To create the variant tag, follow these steps:
- In Google Tag Manager, navigate to Tags.
- Click the New button to create a new tag.
- Name the tag Experiment 1 – Variant – Script.
- In the Tag Configuration section, select Tag Type as Custom HTML.
-
Copy and paste the following code into the Custom HTML block:
-
Select the Trigger as Experiment 1 – Variant – Page View.
- Click Save.
This is where you can add the JavaScript for your experiment to manipulate the page.

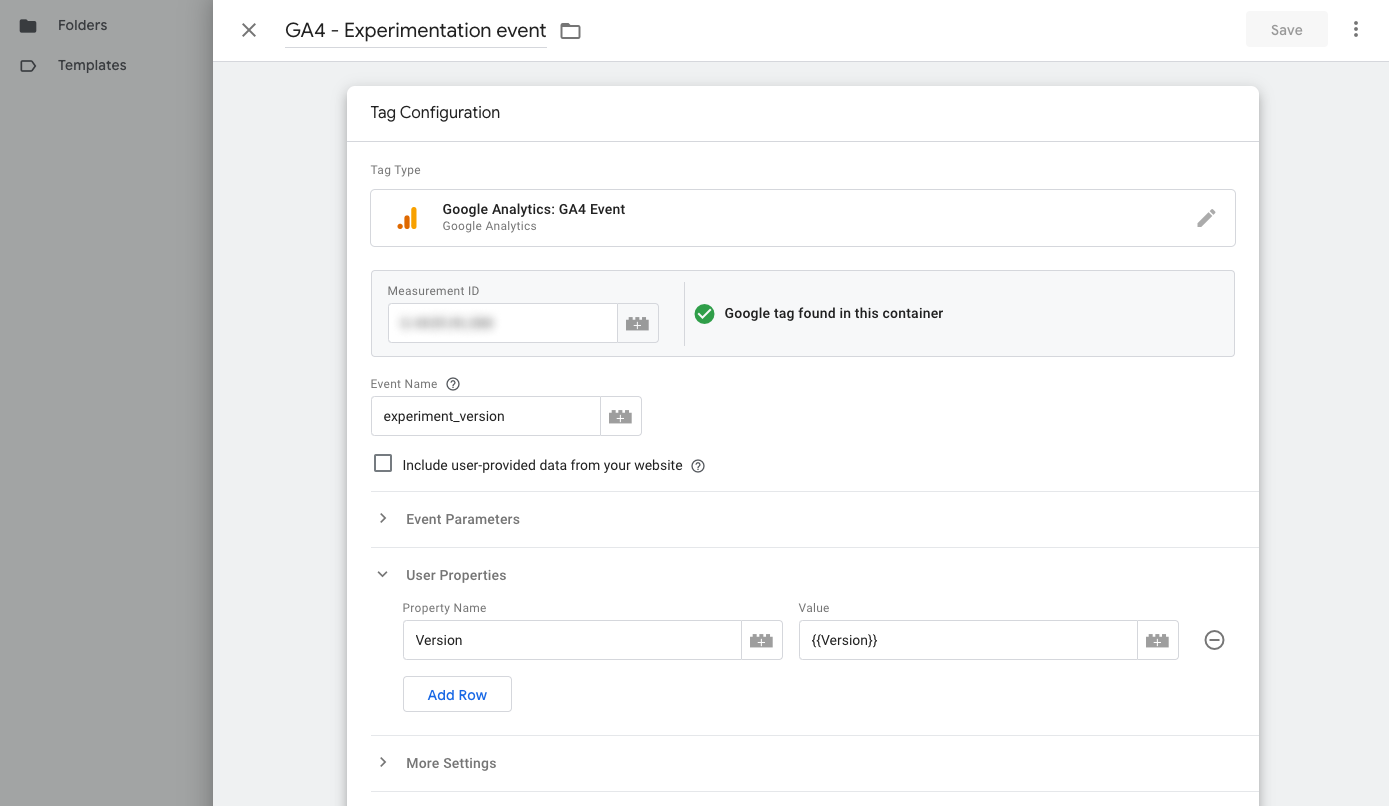
GA Experimentation event
To complete the setup, we need to fire a event to push the Version variable to Google Analytics.
- Create a new tag.
- Name: GA4 - Experimentation event.
- For the tag configuration select Google Analytics > Google Analytics: GA4 Event.
- Add your Measurement ID (can be found in GA > Settings > Data streams > select data stream > Look for measurement ID).
- Add Event Name: experiment_version
- Add User Properties - Property Name: Version
- Add User Properties - Value:
{{Version}} - Triggering type: All Pages